
In this blog, I will explain how you can create a timesheet in Notion using the new buttons functionality.
Using this time tracker you'll be able to understand better how much time you are investing in each project. This can be used to adjust your workload or create client invoices. With Notion's buttons function, creating a time tracker is easier than ever.
⭐The ready-made template is for sale for $5 here, if you don’t have time to follow the blog instructions.⭐
There is an accompanying YouTube video 👇
As the video was created before the release of Notion Formulas 2.0 some of the formulas are now out of date. You can copy the correct formulas from this blog using the same process and database set-up as in the video. I’ll be creating a new video soon!
1. Create the timesheet and project database
-
Start by creating a blank Notion Page
-
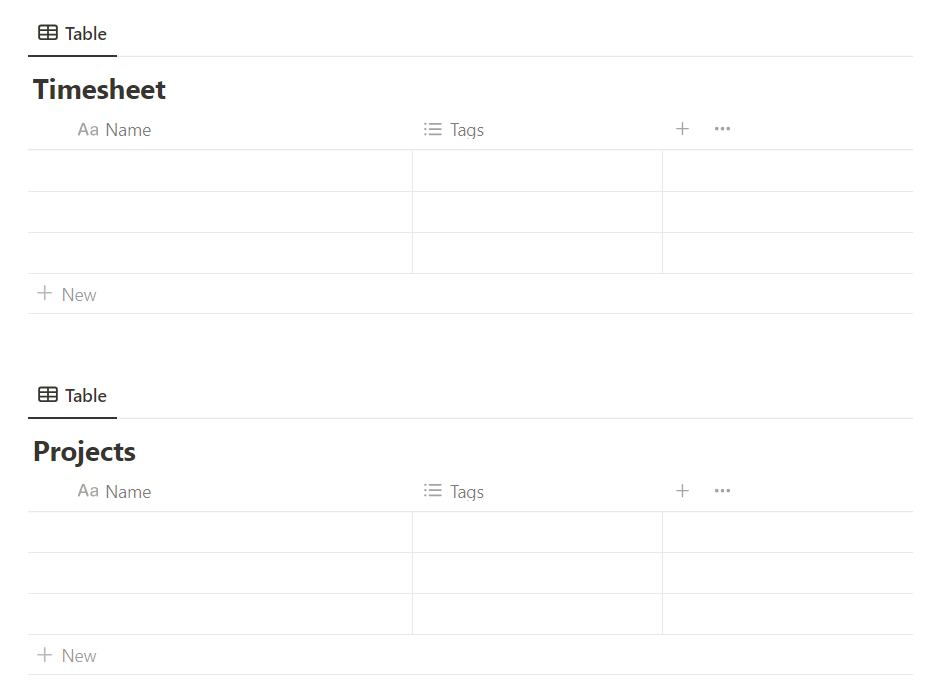
In the page create 2 inline databases one called Timesheet and another called Projects.
-
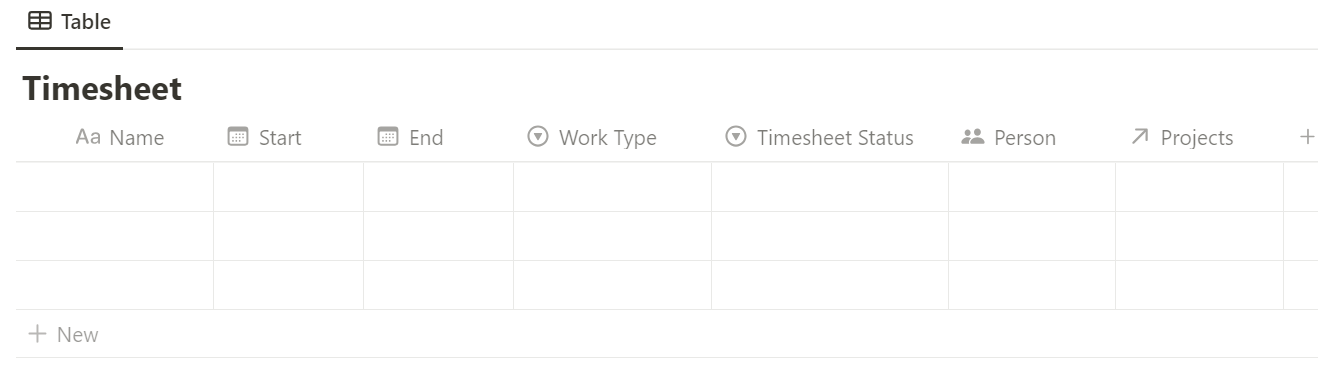
Within the Timesheet database, create the following properties:
-
Date property called Start
-
Date property called End
-
Select property called Work Type - this is optional, I use it to record whether the work I'm doing is development work or a meeting.
-
Select property called Timesheet Status - add the options Current, Paused, Completed
-
Person property
-
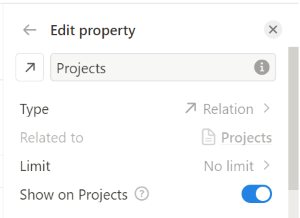
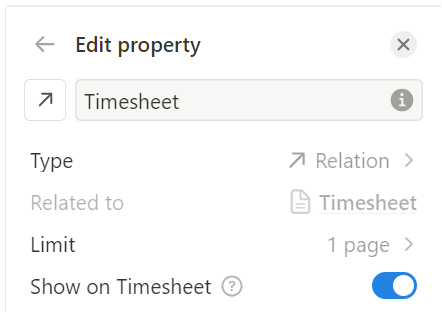
Relation property - relating it to the Projects database - make sure Show on Projects is turned on.
-
-
Within the Projects database, create the following properties:
-
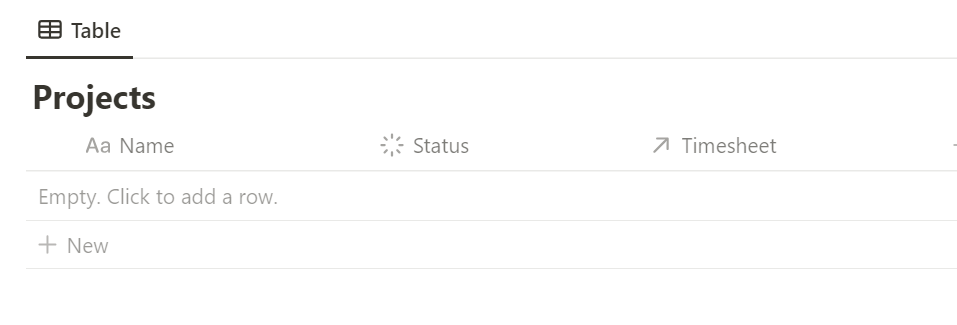
The relation to the timesheet database will already be shown (if you clicked on Show on Project in the last step)
-
Create a standard status property called Status
-
-
Your Projects database should now look like this:
-
Within the Projects database, create the following properties:
-
The relation to the timesheet database will already be shown (if you clicked on Show on Project in the last step)
-
Create a standard status property called Status
-
-
Your Projects database should now look like this:
2. Create the Start Button
Now you create a Start button, that adds a record to the Timesheet database:
-
Above the Timesheet inline database add a button, name it Start, and add a relevant icon.
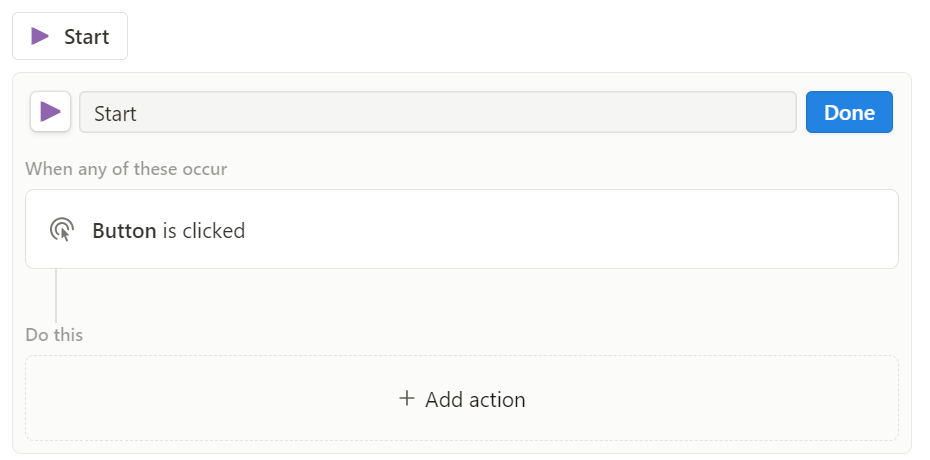
-
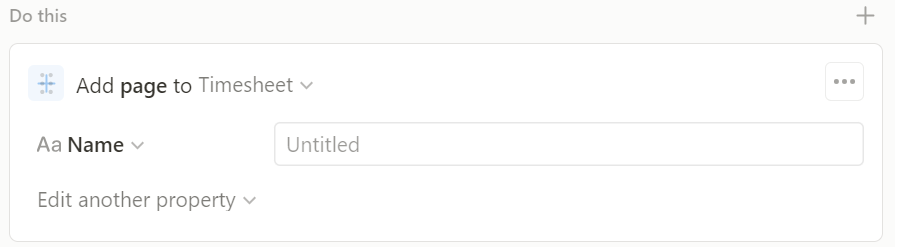
Click on Add action, select Add page to… and select the Timesheet database
-
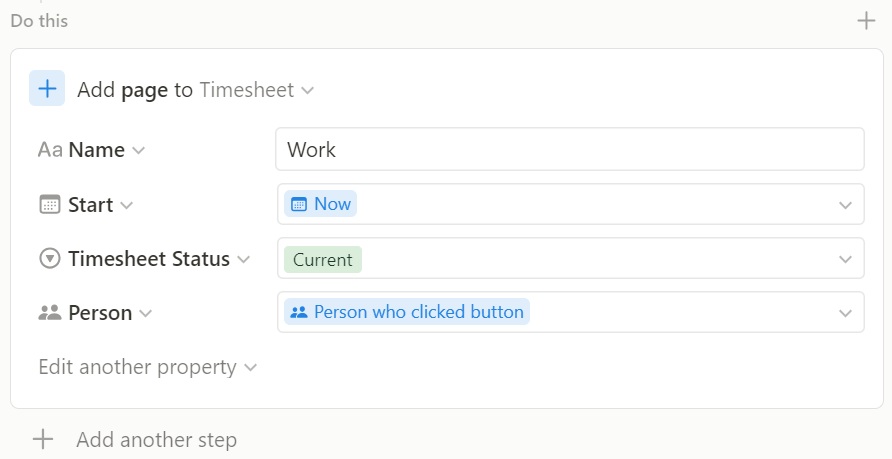
Set the button properties as shown in the image below using Edit another property to add each property.
-
Done
-
Click on the new Start button to test it adds a record to the Timesheet database
-
Add a project for this record
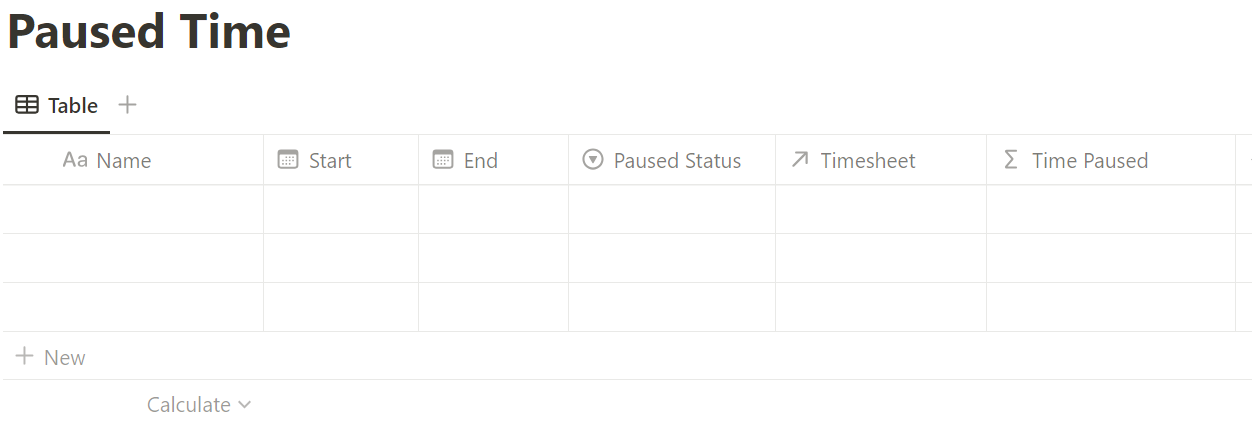
3. Create Paused Time Database
Create a new full-page database called Paused Time and add the following properties to the database:
-
Date property called Start
-
Date property called End
-
Select property called Paused Status with the options Calculated and Paused
-
Relation property - relating to the timesheet database, make sure you select Show on Timesheet and limit it to one page.
-
Formula property called Time Paused - this calculates the difference in time between the start and end date.
empty(prop("End")) ? dateBetween(now(), prop("Start"), "minutes") : dateBetween(prop("End"), prop("Start"), "minutes")
⚠️ if the formula doesn’t work when you paste it into Notion see the note at the bottom of this blog for common errors and how to fix them.
The database should look like this:
4. Pausing the Time with buttons
Next you will create a template for the Timesheet database that contains 3 buttons, a Pause button, an Unpause button, and a Finish Job button.
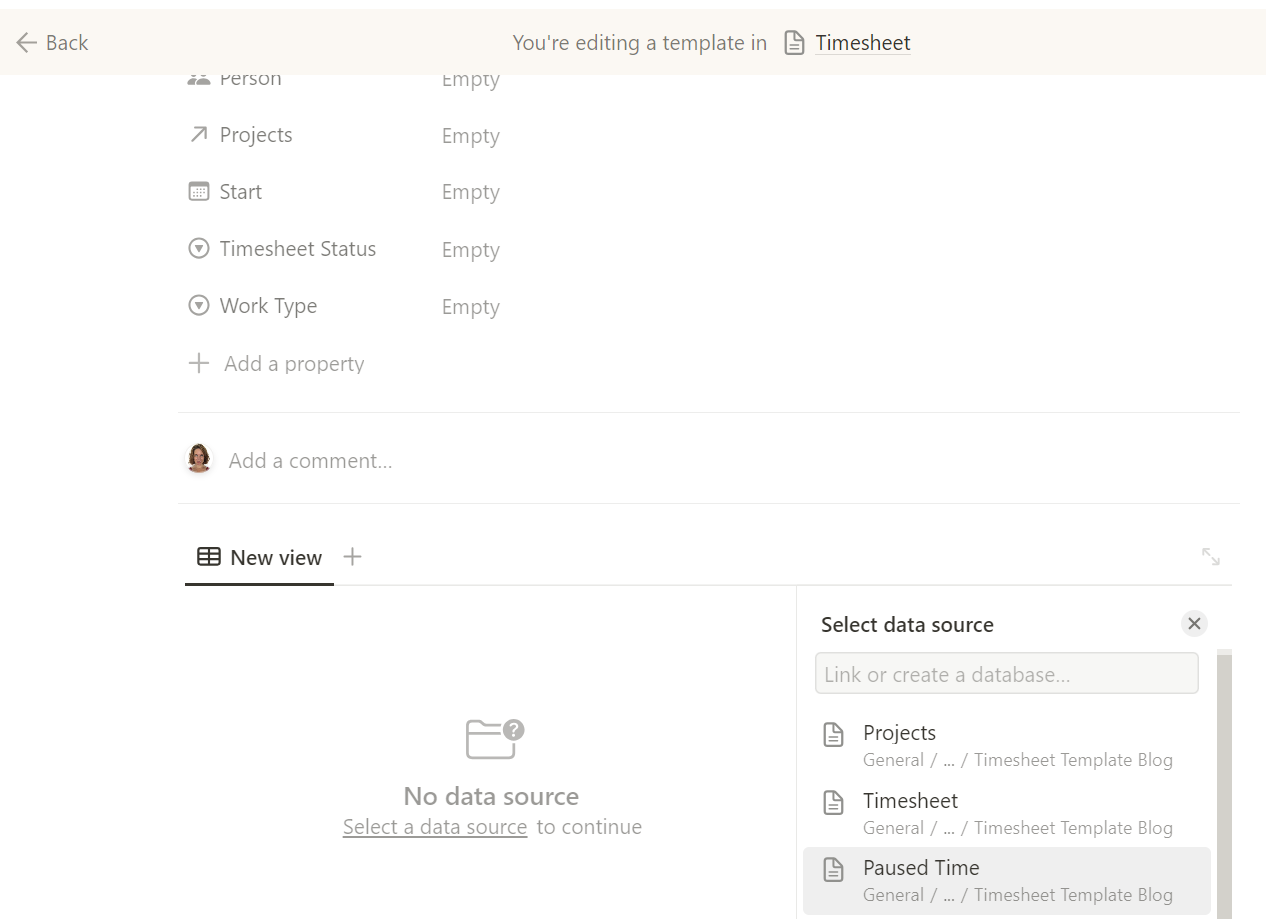
Create a New Template
Open up a new template for the Timesheet database
-
Click on the down arrow on the database’s New button
-
Select New template

Create Table View
-
Give the template a standard name and icon.
-
Scroll down and in the body of the record add a table view:
-
Select the Paused Time database.
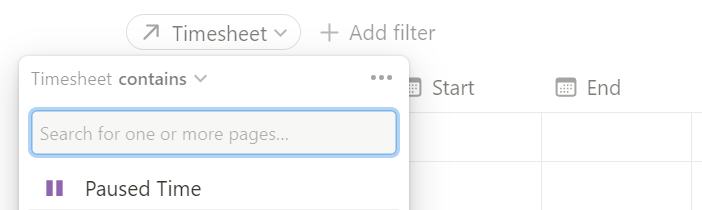
-
Filter the table to show all the records in the Paused database that are related to the timesheet record you are viewing
-
Click on filter and select the Timesheet relation property
-
Select the template name you've just created and Click Save for everyone
-
-
Tidy the table
-
Hide the database name and filter
-
Set the timesheet relation property to Hide in view
-
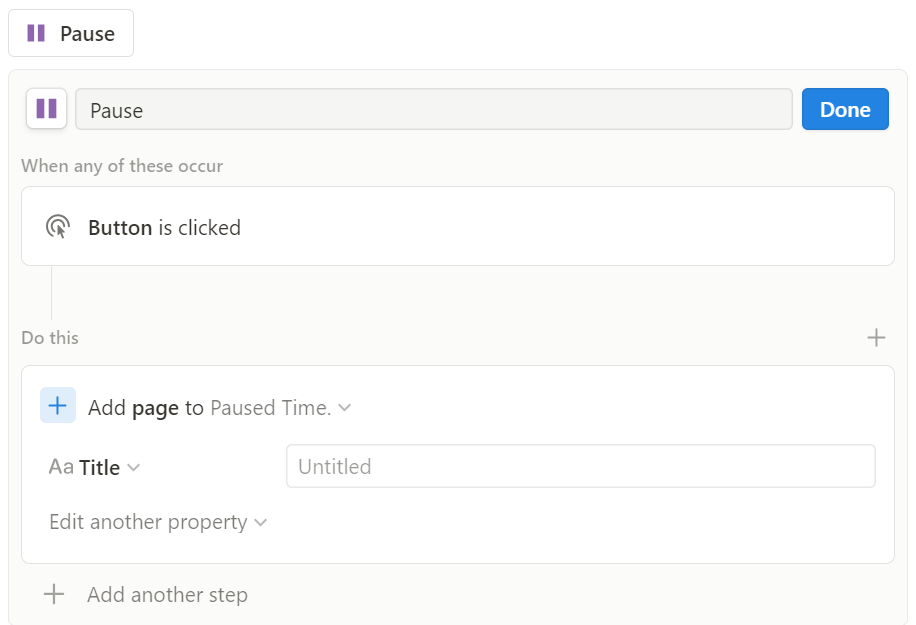
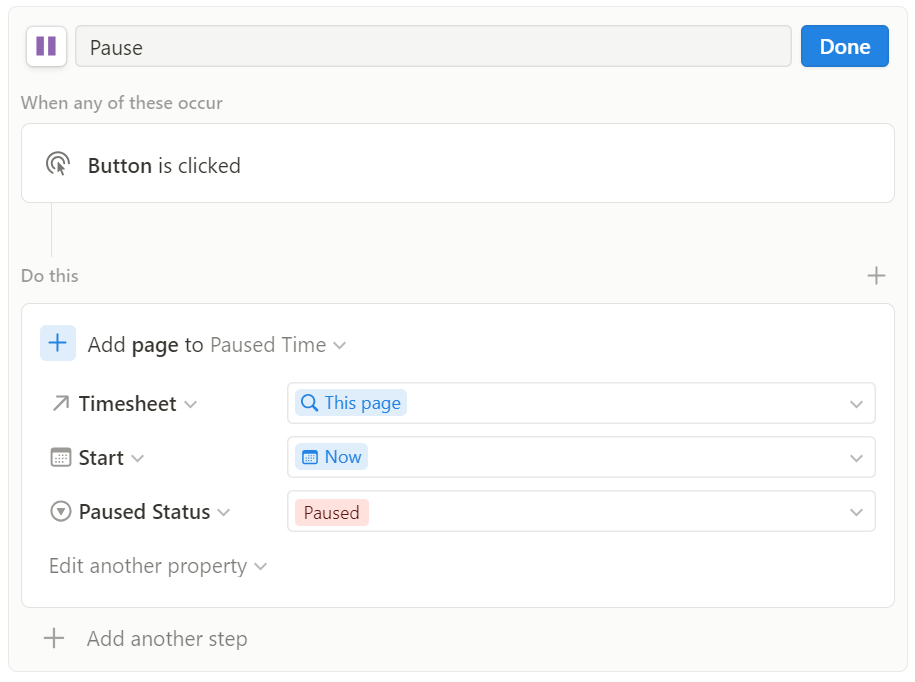
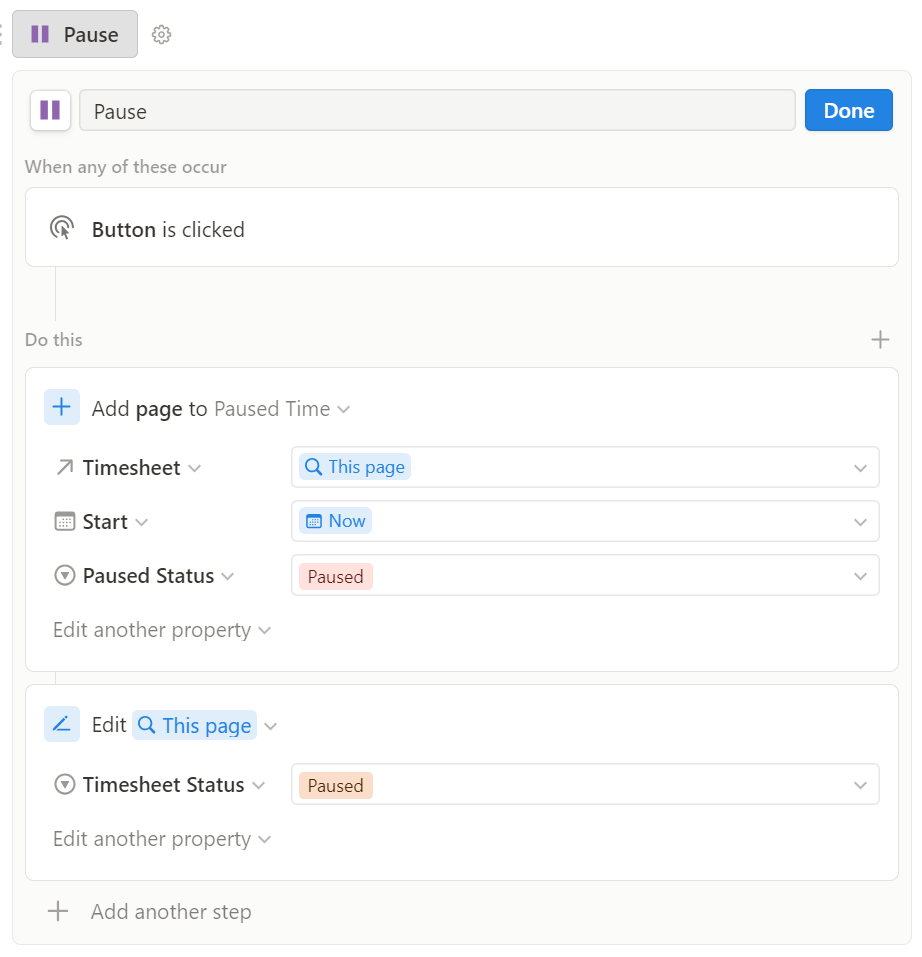
Create Pause Button
This button will add a record to the paused time database.
-
Add a button above the table view, name it Pause, and add a relevant icon.
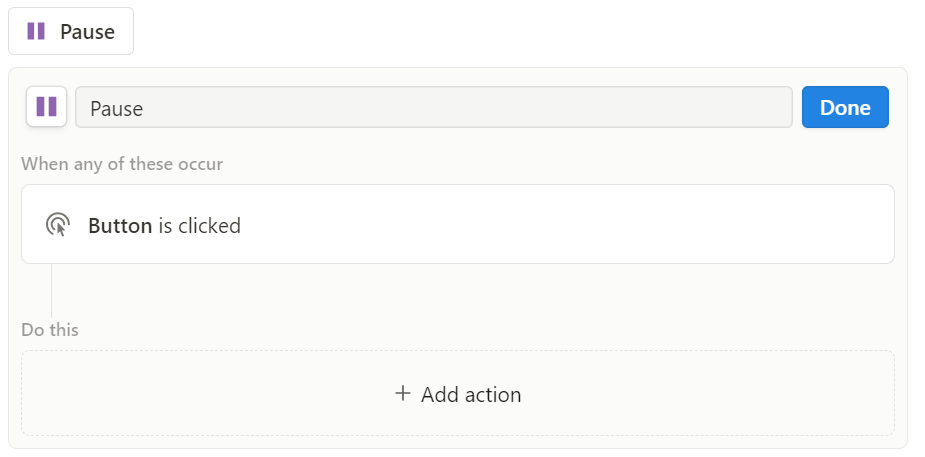
-
Click on Add action, select Add page to… and select the Paused Time database
-
Set the button properties as shown in the image below using Edit another property to add each property.
-
Add another step and set to edit pages in ... This page (the timesheet record)
-
Click Done
-
The paused button is now added to the template
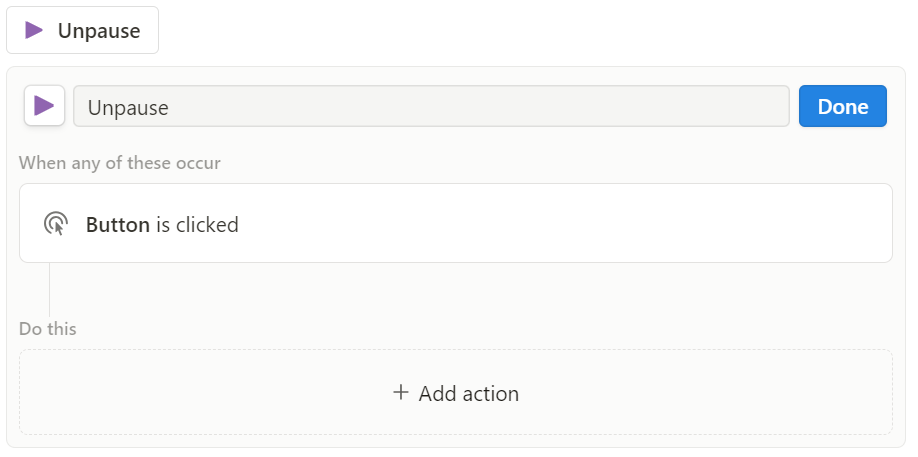
Create Unpause Button
This button will add an end time and date to the paused record in the paused database.
-
Add another button above the table view, name it Unpause, and add a relevant icon.
-
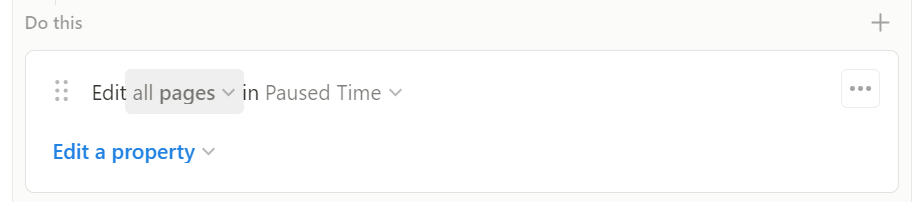
Click on Add action, select Edit pages in… and select the Paused Time database
-
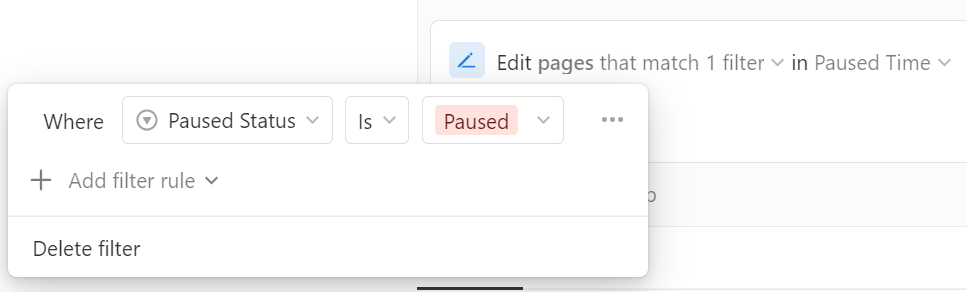
You then want to add a filter to this action so it’ll only add an end time to the current paused record. To do this click on all pages in the action box (see image)
-
Set the filter to Where Paused Status is Paused
-
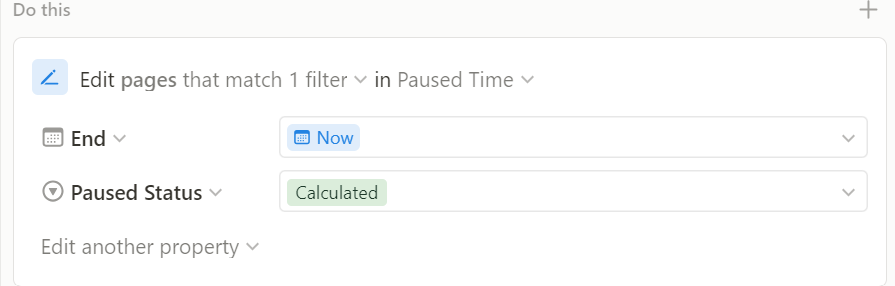
Set the button properties as shown in the image below using Edit another property to add each property.
-
Add another step, select edit pages in.. and then select this page (this edits the timesheet record you're in)
-
Set the Timesheet status to Current
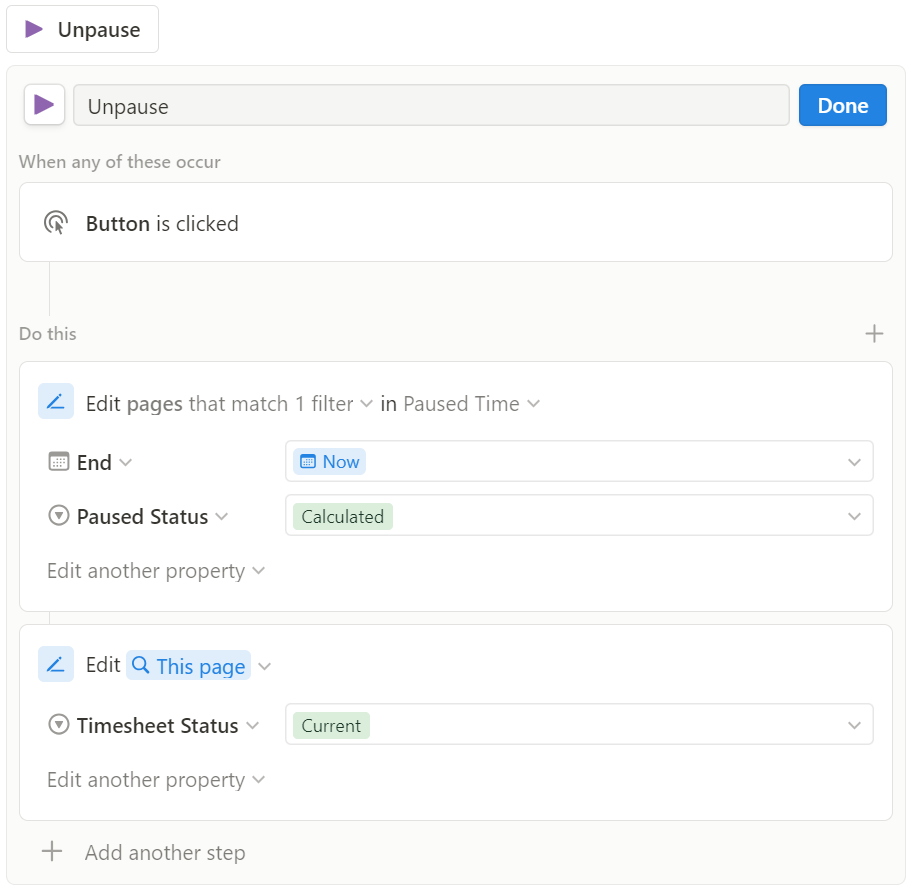
-
Done
Create Finish Job Button
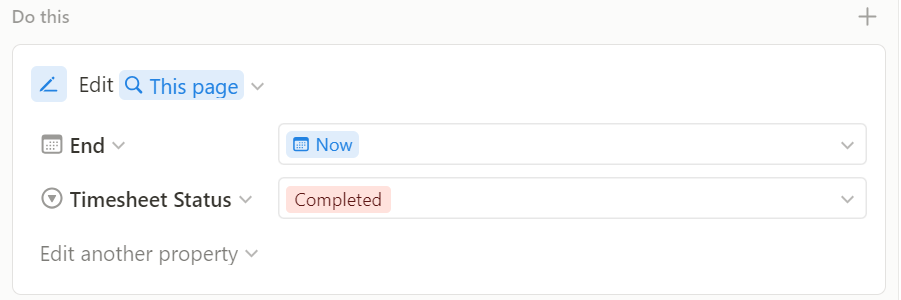
This button will add an end date to the timesheet record.
-
Add another button above the table view, name it Finish Job, and add a relevant icon.
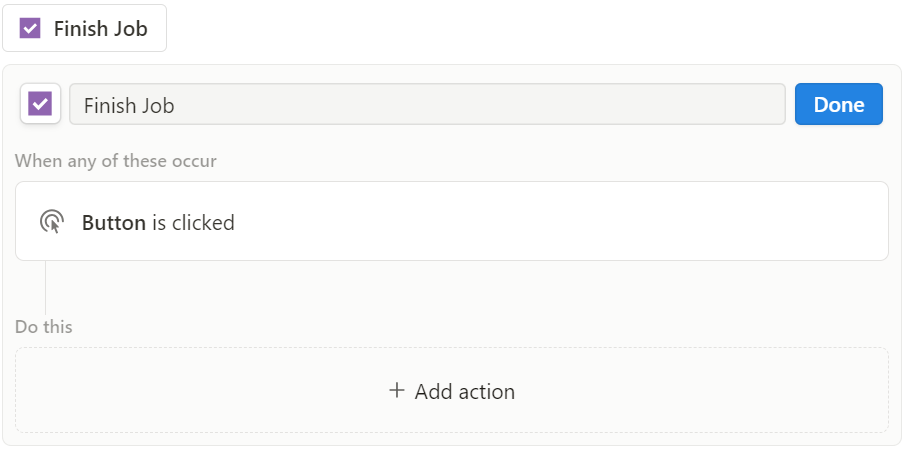
-
Click on Add action, select Edit pages in… and select the this page
-
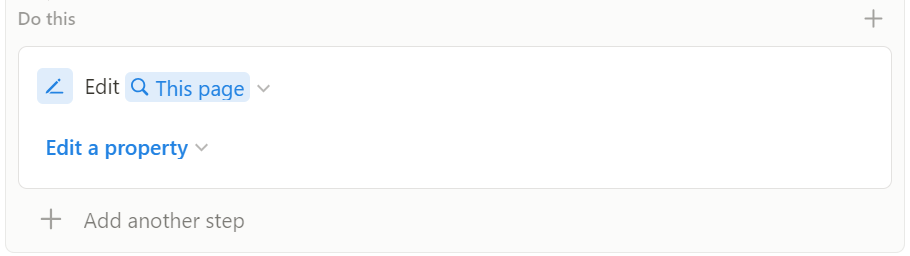
Set the button properties as shown in the image below using Edit another property to add each property.
-
Done
-
The finish Job button has been added to the template.
5. Complete the template and set as default
-
Rearrange the buttons in the template so they appear in a row above the table view

-
Exit the template editing screen by clicking the back button (top left)
-
On the timesheet database select the drop-down arrow next to the New button and set the default template to the one you've just created.
6. Calculating Time in the Timesheet
Now you need to add some formulas to the Timesheet database to calculate the total time spent on each job, minus all the paused time.
Timesheet Database Formulas
-
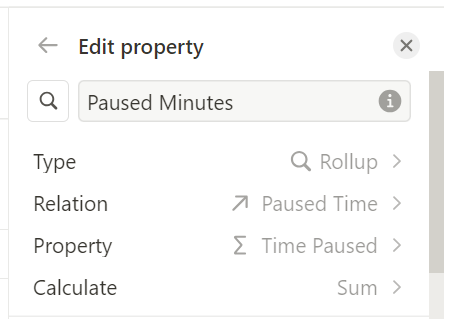
Add a rollup property to the Timesheet database called Paused Minutes
-
Select the Paused time relation - the Time Paused property - Sum as the calculate option.
-
-
Add a formula property called Total Time (minutes)
-
Set the formula to the following:
if(empty(prop("End")), (dateBetween(now(), prop("Start"), "minutes") - prop("Paused Minutes")), (dateBetween(prop("End"), prop("Start"), "minutes") - prop("Paused Minutes")))
⚠️ if the formula doesn’t work when you paste it into Notion see the note at the bottom of this blog for common errors and how to fix them.
-
Add a formula property called Total Time
-
Set the formula to the following - This will convert the time in minutes to a more readable hours and minutes display
if(((prop("Total Time (minutes)") / 60) == 0), "00:00", (((format(floor(prop("Total Time (minutes)") / 60)) + "hr ") + format(prop("Total Time (minutes)") - (floor(prop("Total Time (minutes)") / 60) * 60))) + "min"))
⚠️ if the formula doesn’t work when you paste it into Notion see the note at the bottom of this blog for common errors and how to fix them.
Projects Database formulas
Lastly, you need to add some properties to the Projects database, that calculate the total time for each project.
-
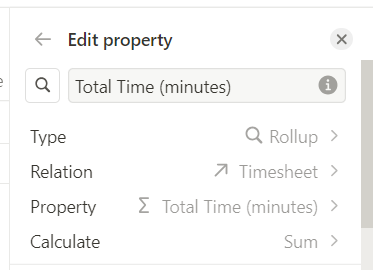
Start by adding a rollup property,
-
Select the Timesheet relation - the Total Time (minutes) property - Sum as the calculate option.
-
Name this property Total Time (minutes).
-
-
Create a formula property and call it Total Time.
-
Set the formula to the following:
if(((prop("Total Time (minutes)") / 60) == 0), "00:00", (((format(floor(prop("Total Time (minutes)") / 60)) + "hr ") + format(prop("Total Time (minutes)") - (floor(prop("Total Time (minutes)") / 60) * 60))) + "min"))
⚠️ if the formula doesn’t work when you paste it into Notion see the note at the bottom of this blog for common errors and how to fix them.
And that's it, you have a simple time-tracking tool where you can use buttons to pause the work and calculate the total time spent on each job.
⭐ Note about copy and pasting formula v typing out formula ⭐
Since the introduction of Notion’s Formulas 2.0 the formula you copy and paste into a formula property will look different to if you type it out manually.
When you copy this formula and paste it into a formula property in Notion
empty(prop("End")) ? dateBetween(now(), prop("Start"), "minutes") : dateBetween(prop("End"), prop("Start"), "minutes")
Notion converts it to look like this:

If I typed the the formulas into this blog as it appears in Notion it wouldn’t work when you paste it back into Notion

⭐ Errors with formulas and what to look out for ⭐
If you get an error message when you paste the formulas from this blog into Notion and it looks like this 👇

This means that Notion does not recognise the property name “Total Time (minutes)” - check that you’ve named the property correctly, especially using the exact same case. Notion is case sensitive so this error will occur if you named the property “Total time (minutes)” - notice the small t in time, it should be a capital T.
A formula in Notion that correctly recognises the property names will look like this 👇 (notice the property names have a grey background)

